EMAIL SUPPORT
dclessons@dclessons.comLOCATION
USLAB Configure Inter EPG layer 2 Connectivity
Task :
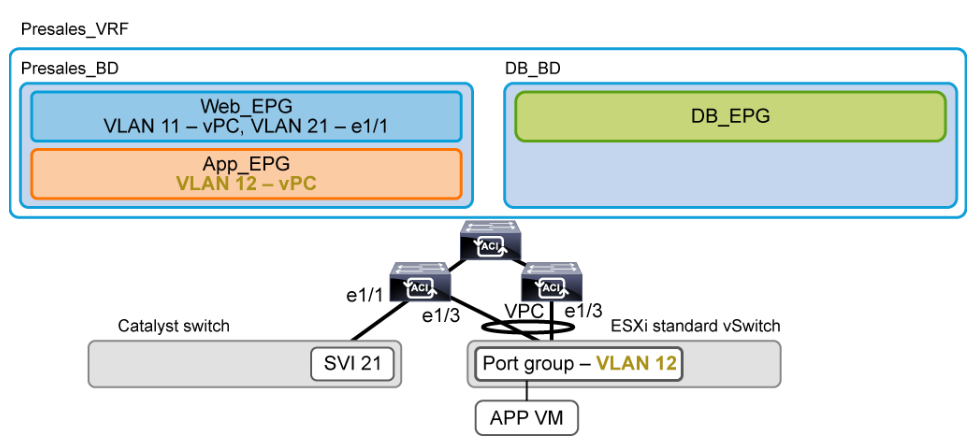
Create a second EPG (App_EPG) in the same bridge domain as Web_EPG to test Cisco ACI contracts for Layer 2 connectivity.
Topology:
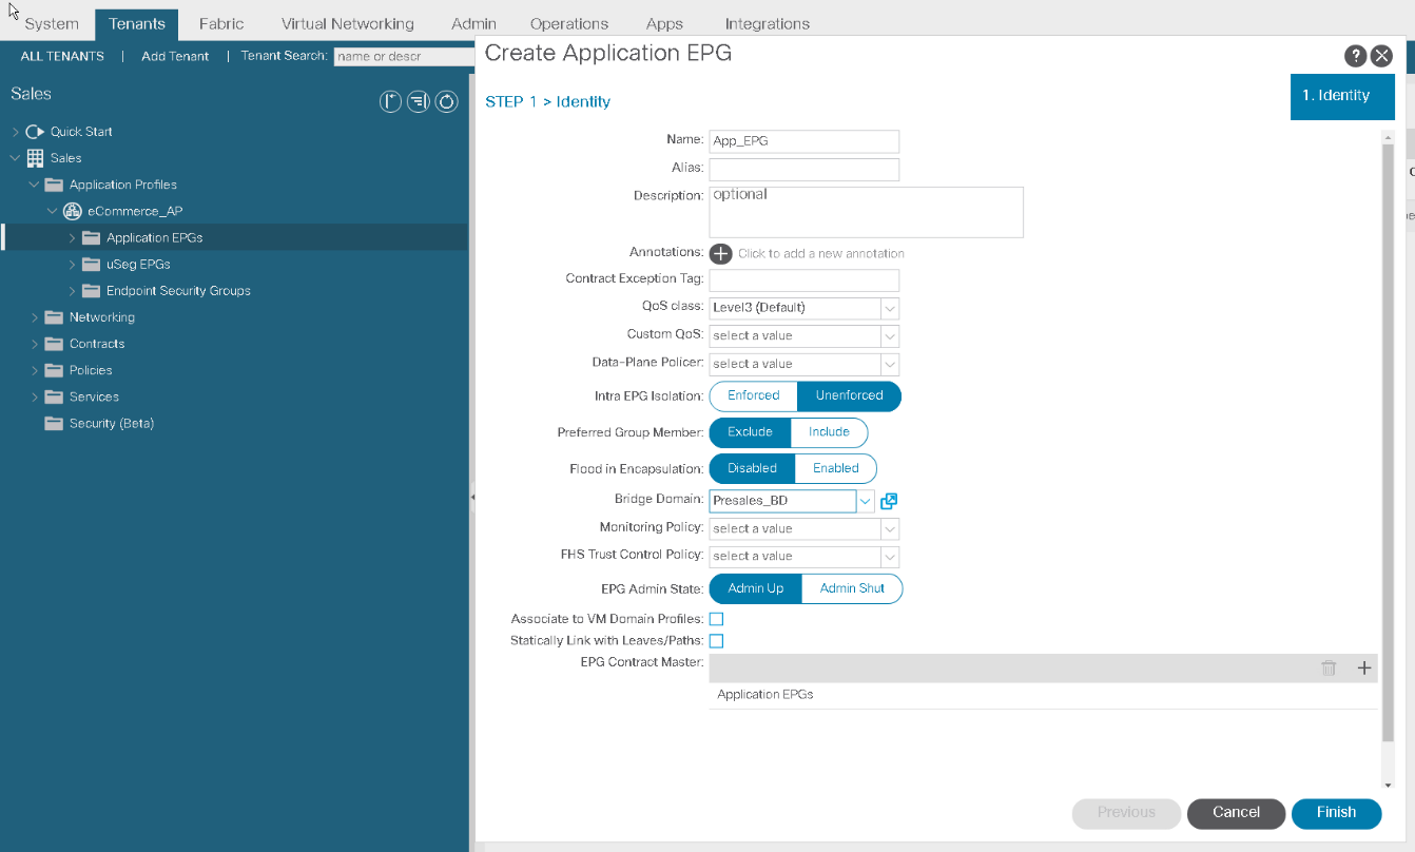
Go to Tenants > Sales > Application Profiles > eCommerce_AP > Application EPGs. Right-click Application EPGs and choose Create Application EPG.
Enter the EPG name App_EPG, assign it to the bridge domain Presales_BD and click Finish.
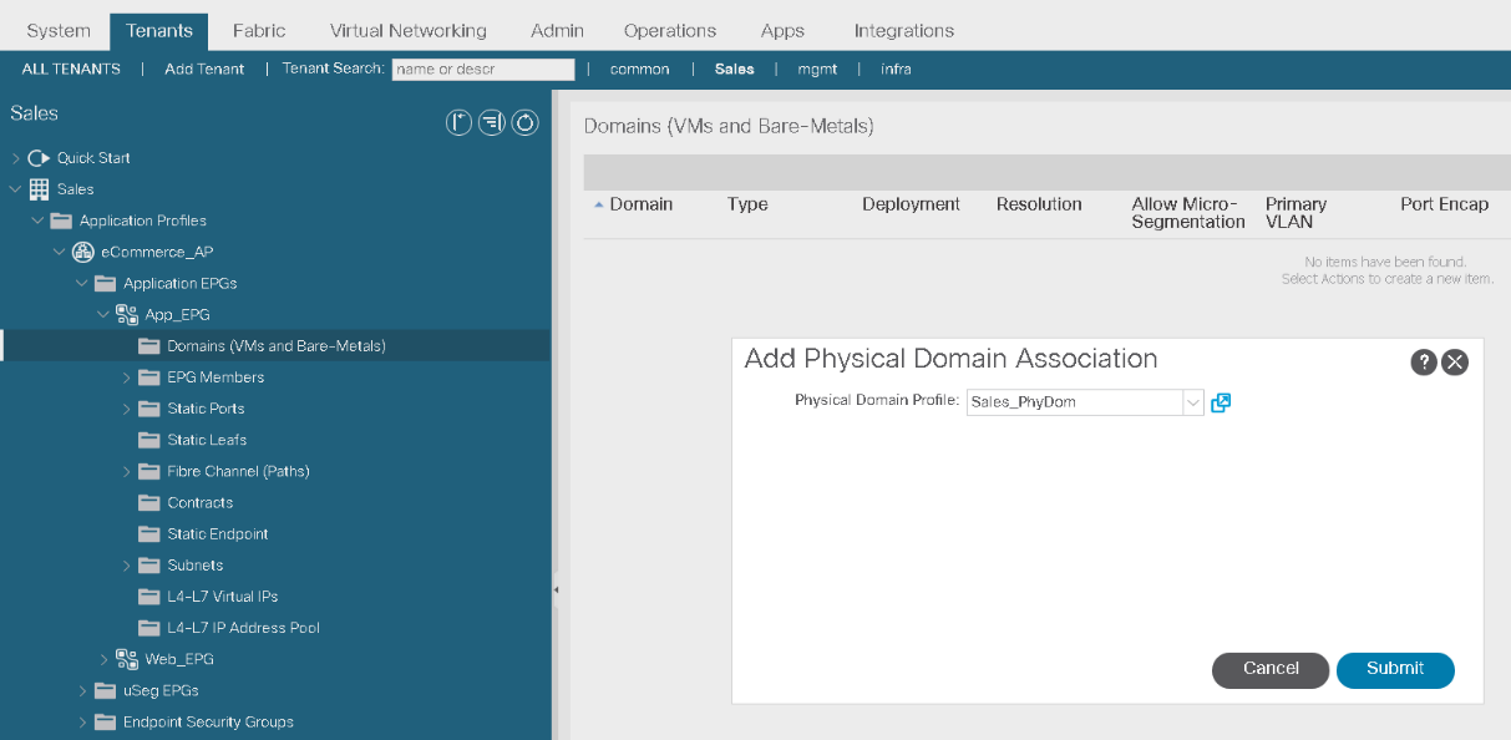
Expand App_EPG, right-click Domains (VMs and Bare Metals) and choose Add Physical Domain Association. Select the physical domain Sales_PhyDom and click Submit.
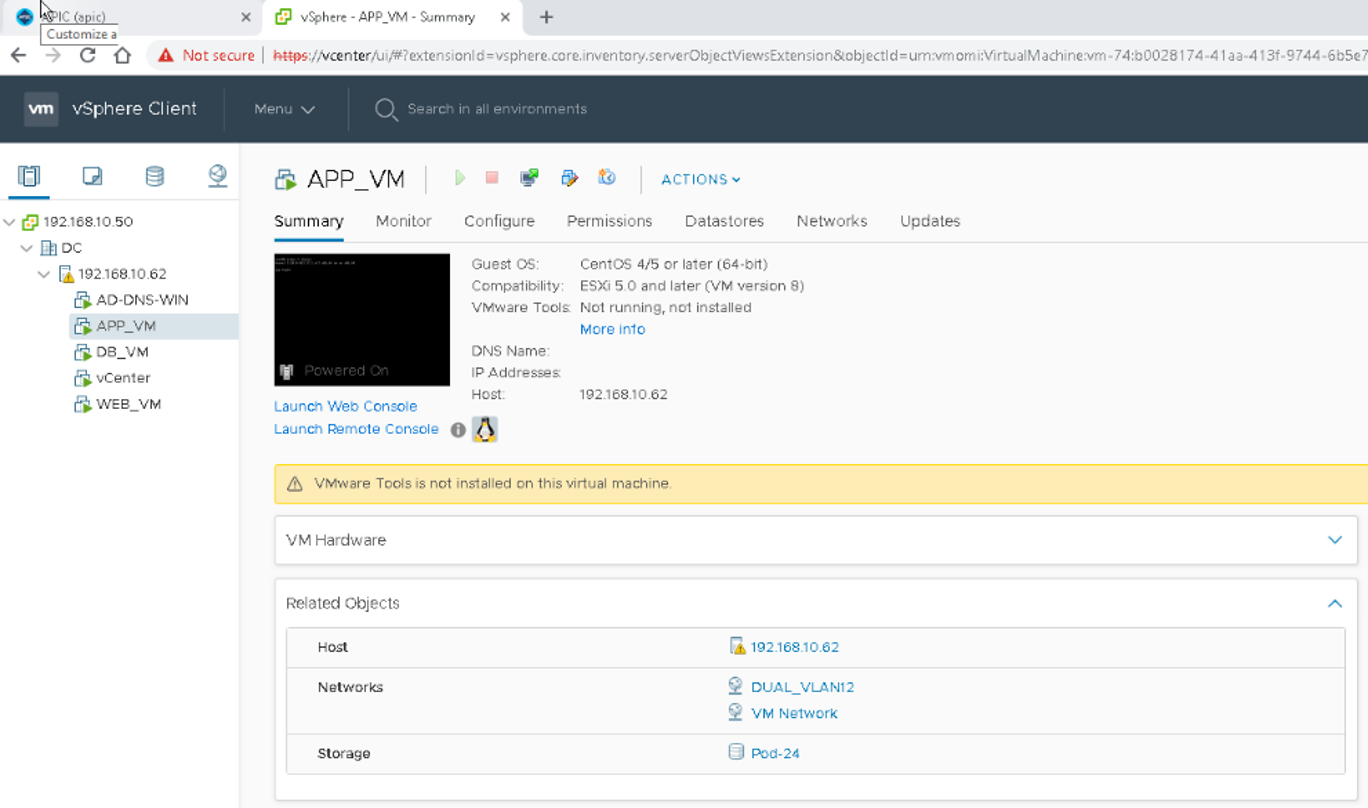
Log in to the vSphere Client. In the vSphere Client, examine the networking setup of the APP_VM, which you will bring in into the EPG.
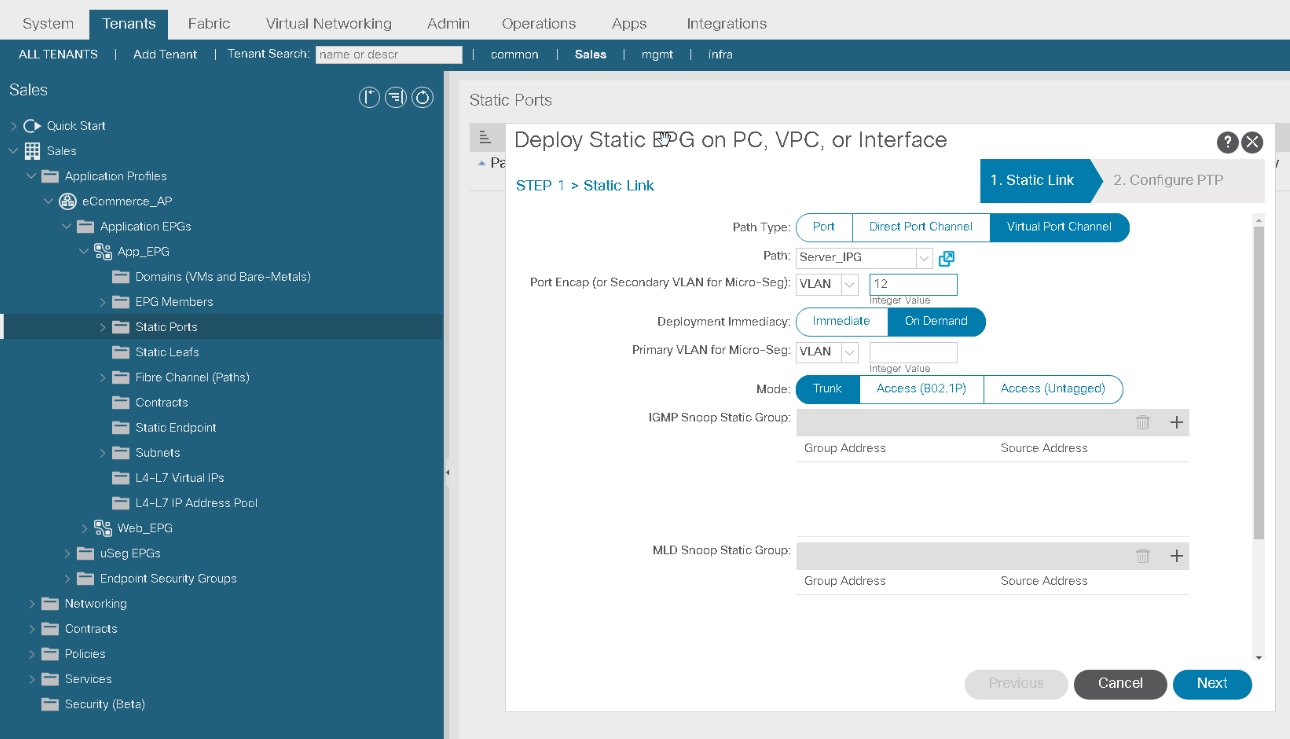
Return to the Cisco APIC user interface and proceed to configure the static path binding for the APP_VM. Expand the App_EPG and right-click Static Ports to Deploy Static EPG on PC, VPC, or Interface.
Configure the static port settings below. Leave other parameters at their default values. Click Next and Finish.
- Path Type: Virtual Port Channel
- Path: Server_IPG
- Port Encap (or Secondary VLAN for Micro-Seg): VLAN 12
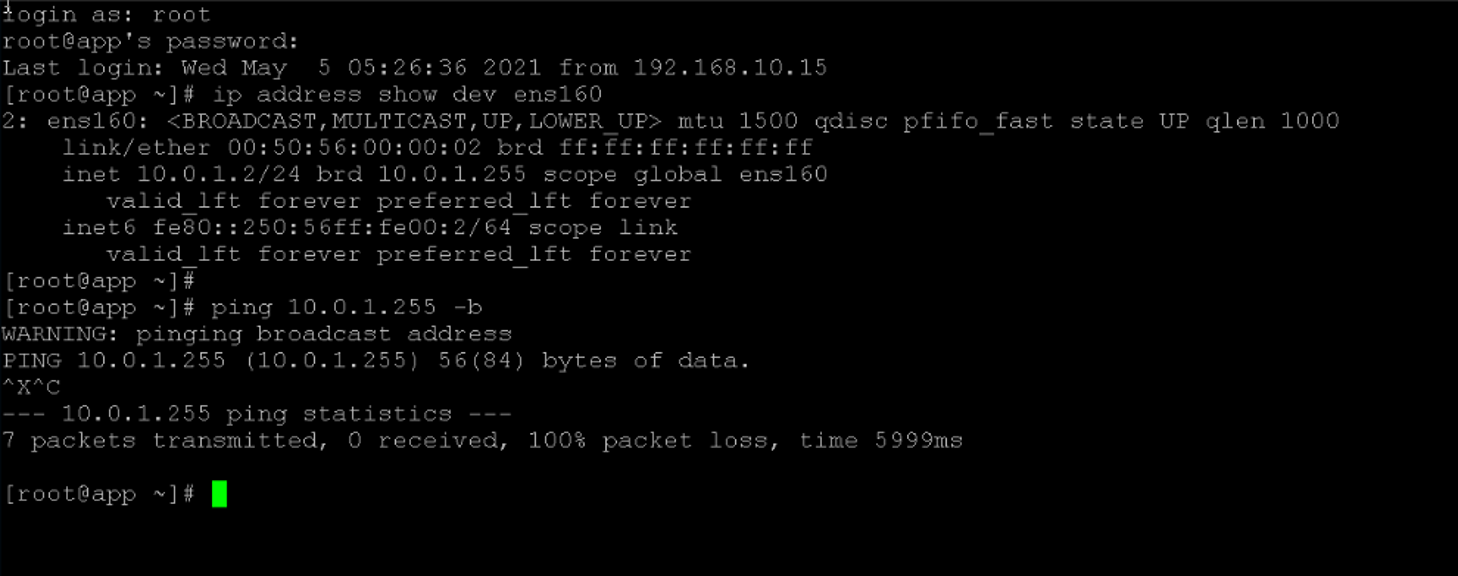
Use PuTTY to connect to the app. Use the ip address show dev ens160 command to examine the IP address of the fabric interface. Ping its broadcast IP using the ping 10.0.1.255 -b command.
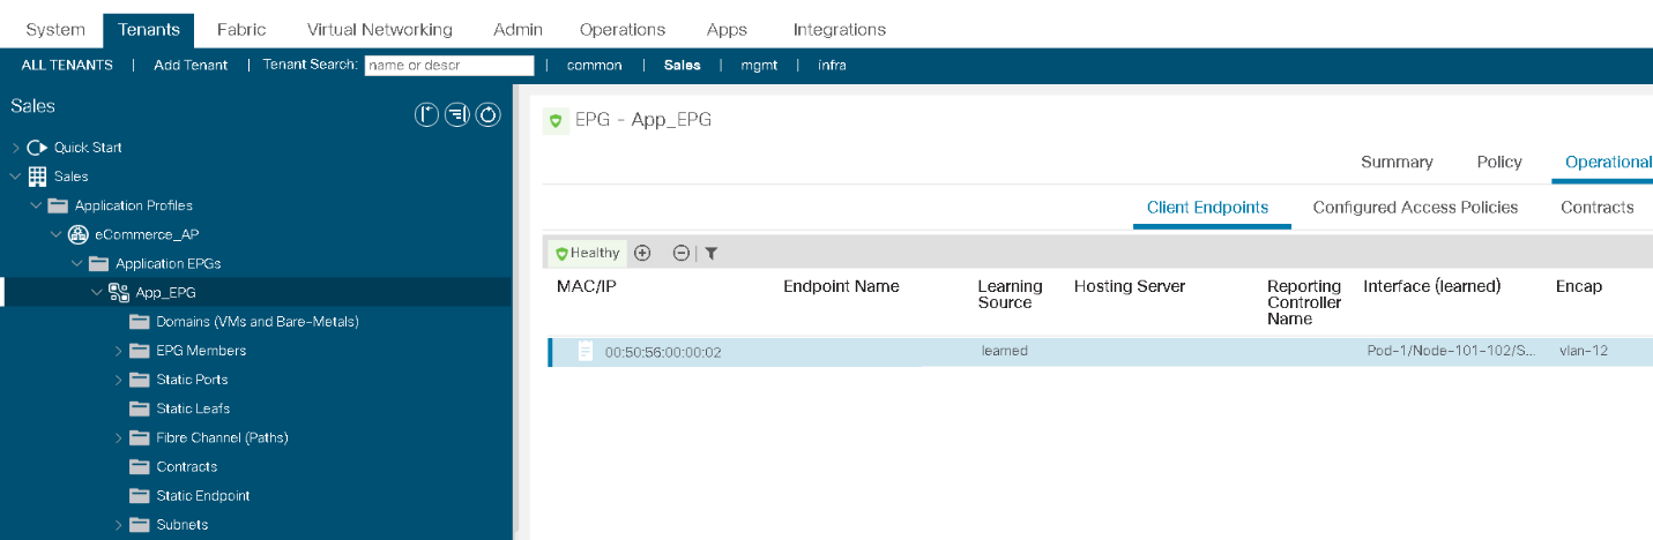
Within your tenant Sales, select the App_EPG, choose the Operational tab and examine the learned endpoint. Click the Refresh icon if needed.
Create Filters and Contracts
In this task, you will create a contract along with filters for Internet Control Message Protocol (ICMP), SSH, HTTP, and HTTPS. Later, you will apply this contract to EPGs. The Basic_Fltr filter will allow ICMP and SSH; the Web_Fltr filter will permit HTTP and HTTPS.

Comment
TABLE OF CONTENTS
- LAB 1 How to Validate Fabric Discovery
- LAB 2 Configure NTP
- LAB 3 Create & Configure Access Policies & vPC
- LAB 4 Configure Layer 2 Connectivity in Same EPG
- LAB 5 Configure Inter EPG layer 2 Connectivity
- LAB 6 Configure Inter-EPG Layer3 Connectivity
- LAB 7 Traffic Forwarding Method in BD
- LAB 8 Configure External Layer 2 Connection
- LAB 9 Configure External Layer 3 (L3Out) Connection
- LAB 10 Integrate APIC with vCenter using VMware VDS
RECENT POSTS
- Installing Context-Aware Network Access Control using Cisco ISE Policies
- Designing Network Access Control that is Scalable using Cisco ISE Architecture
- Enterprise Network Access Control and Policy Enforcement using Cisco ISE
- Secure Device Administration and Network Access Using AAA Architecture
- Designing Enterprise-Class Hybrid Cloud Connectivity Using AWS Networking Services
- Exploring Core AWS Networking and Messaging Concepts for Modern Cloud Architectures
- Understanding Key AWS Services for Modern Cloud Architectures
- Building a Strong AWS Foundation with Amazon S3, EC2, and Virtual Private Cloud
- Understanding the ENSDWI Course: Advanced Cisco SD-WAN (Viptela) Concepts
- A Complete Guide to the DCACI-A Course: Mastering Advanced Cisco ACI Concepts


LEAVE A COMMENT
Please login here to comment.