EMAIL SUPPORT
dclessons@dclessons.comLOCATION
USConfigure NTP
In this scenario, you will use NTP to synchronize the Cisco Application Policy Infrastructure Controller (APIC) and the fabric to an NTP daemon running on your StudentPC. NTP will start working after out-of-band (OOB) management IP addresses are configured on the fabric switches.
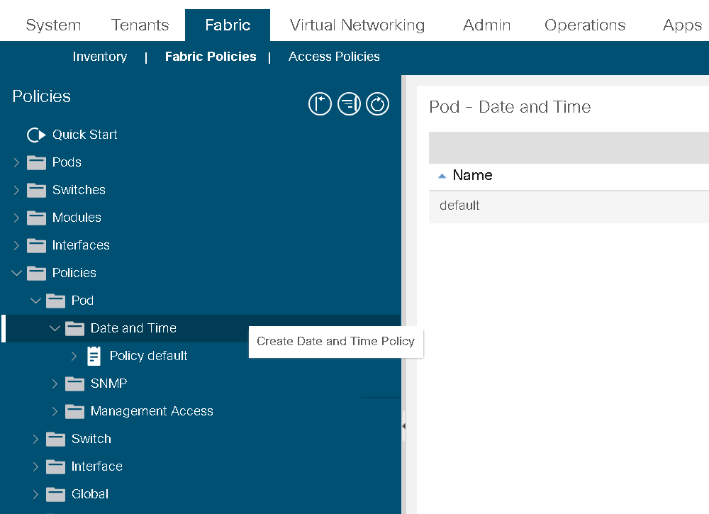
Go to Fabric > Fabric Policies > Policies > Pod > Date and Time. Right-click the menu and select Create Date and Time Policy.
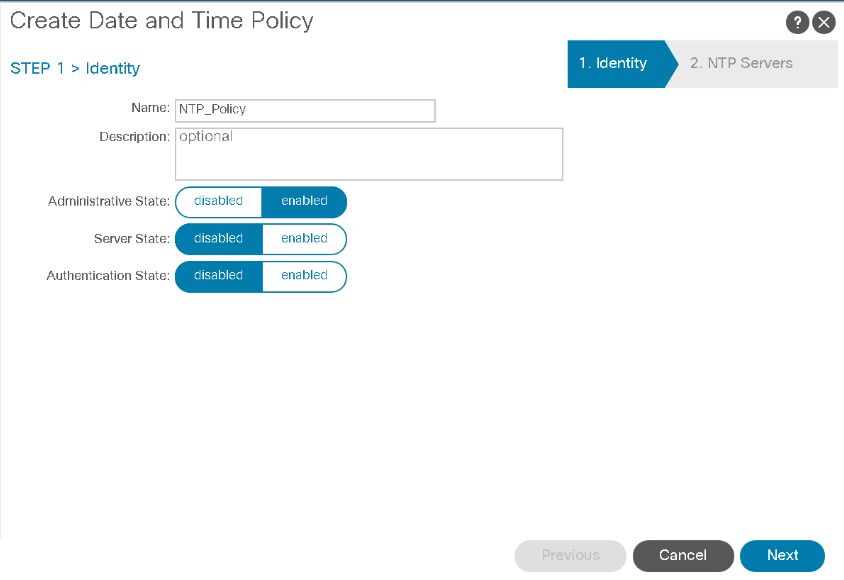
Name the policy NTP, leave the states unchanged (administrative state enabled, server state disabled, authentication state disabled) and click Next.
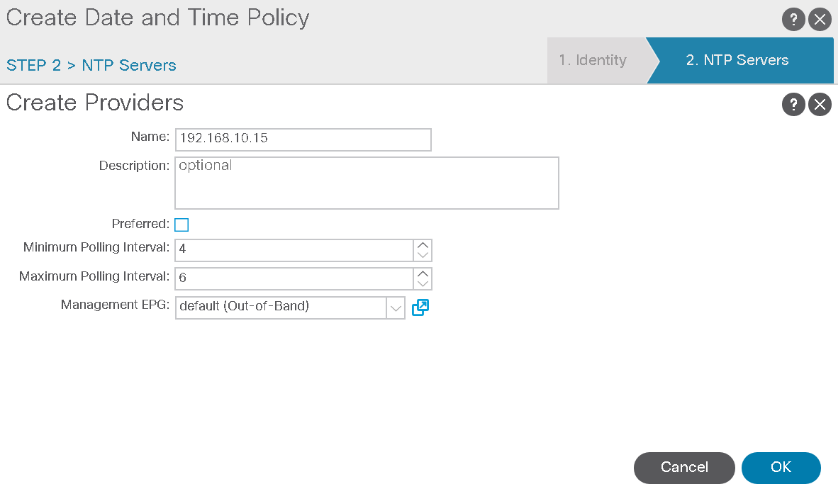
 Click the plus sign (+) in the table to add an NTP server with the settings below. Leave other settings at their default values, then click OK and Finish.
-
Name: 192.168.10.15 (IP address of your StudentPC, which is running an NTP daemon)
-
Management EPG: default (Out-of-Band).
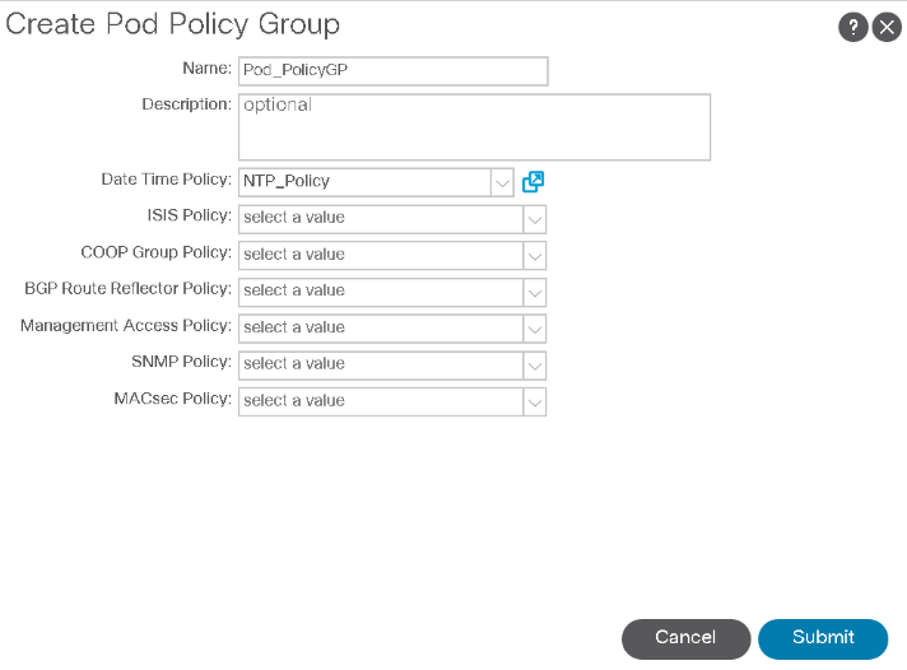
 In Fabric > Fabric Policies > Pods, right-click Policy Groups to Create Pod Policy Group.
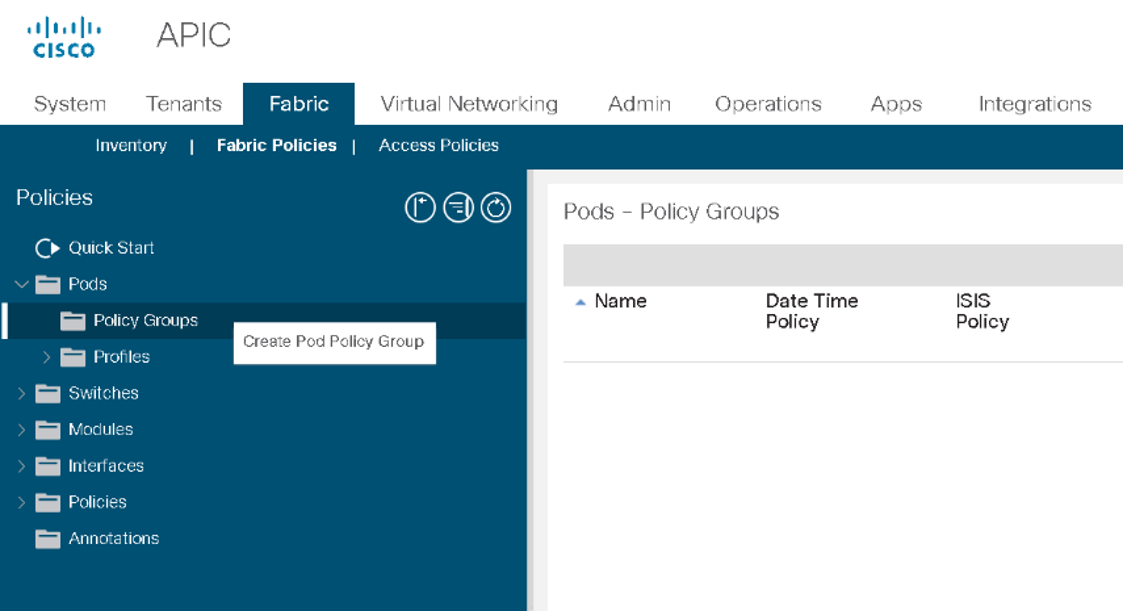
Configure the pod policy group name Pod_PG and choose the Date Time policy NTP. Click Submit.
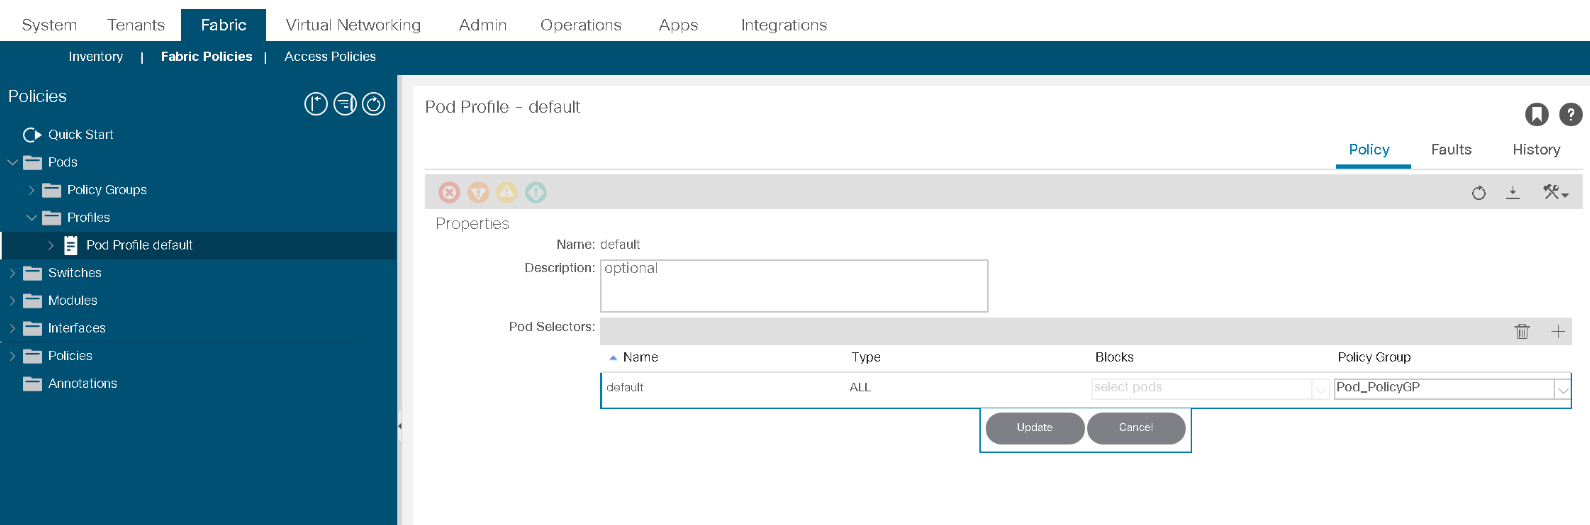
 Go to Fabric > Fabric Policies > Pods > Profiles > Pod Profile default> default. Choose the pod selector default and select the Pod_PG policy from the Fabric Policy Group drop-down. Click Update and Continue.
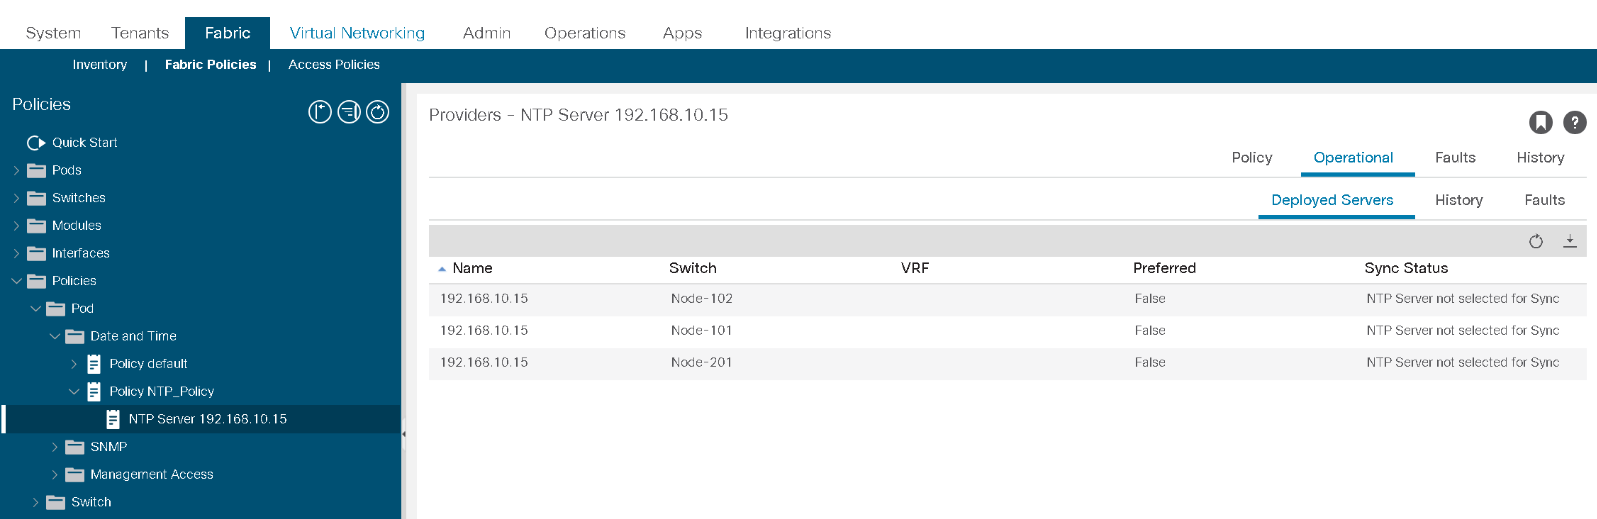
Return to the NTP server configuration in Fabric > Fabric Policies > Policies > Pod > Date and Time > Policy NTP > NTP Server 192.168.10.15, select the Operational tab and examine the Sync Status.
Configure Out-of-Band Management
You will configure OOB management addresses on the fabric switches by defining Static Node Management Addresses for the node ranges. You will first configure the addresses for the leaf range (node IDs 101-102), verify the results and finally configure the address for the range of the single spine.

Comment
TABLE OF CONTENTS
- LAB 1 How to Validate Fabric Discovery
- LAB 2 Configure NTP
- LAB 3 Create & Configure Access Policies & vPC
- LAB 4 Configure Layer 2 Connectivity in Same EPG
- LAB 5 Configure Inter EPG layer 2 Connectivity
- LAB 6 Configure Inter-EPG Layer3 Connectivity
- LAB 7 Traffic Forwarding Method in BD
- LAB 8 Configure External Layer 2 Connection
- LAB 9 Configure External Layer 3 (L3Out) Connection
- LAB 10 Integrate APIC with vCenter using VMware VDS
RECENT POSTS
- Why Network Engineers Should Learn Python for Automation
- How to Set Up and Configure a Fortigate Firewall: Step-by-Step Guide
- Maximize Your Networking Skills with ENSDWI Training Labs and Certification
- Cisco UCS Solutions — Unified Computing Knowledge
- Navigating the SD-WAN Revolution: Insights for Modern Network Architects
- Cisco Data Center Career: Getting Started with Nexus Training
- Lock Down Your Networks in a Digital World: The Ultimate Guide to Learning Mastering Cisco Identity Services Engine (ISE)
- How to Become an AWS Solution Architect — Your Ultimate Guide to Cloud Mastery
- The Docker Training Course Outline - Your Guide to Becoming a Docker Expert
- Develop Next-Level Azure Networking Skills with AZ-700 Training


LEAVE A COMMENT
Please login here to comment.